 TM
TM
|
Getting the best brew from a Melitta Clarity coffee brewer
by Ted Simpson February 2004
Ted Simpson is a coffee roasting 'tinkerer'. He builds innovative coffee roasters, helps others with roasting and brewing coffee on alt.coffee and Sweetmaria's Homeroast list, and is an all round heckuva good guy. I've met him a time or two and we've exchanged hundreds of ideas and stories over the past few years related to coffee, roasting and mental health (oh yeah, he's also a psychologist). Now he's found an easy way to make his automatic drip brewer better. Ed Needham
Melitta Clarity showerhead modification. Goal: Allow water to exit through more holes spaced so that all of the coffee gets wet and extraction is more even. Method: Take showerhead plate off, remove U-shaped dam from top and bottom of the showerhead/lid assembly, drill more holes in showerhead and reassemble. Details: 1) Open hinged lid over filter area. Insert finger into water path tube and lift the showerhead plate off of its assembly. (pics 1-4) 2) Observe the U-shaped dams in the top and bottom plates that comprise the showerhead assembly. Remove these dams, staying flush with the surface. I used a dremel tool and a cutoff wheel. Cutting pliers or even just bending the thin plastic back and forth until it breaks will work. Whatever method you use, do not cut through the top or bottom plates, just the dams. (pics 5-7) 3) Take a small torch or butane lighter and carefully heat the plastic around the large middle hole, heating both the inside and outside of the plate around the hole. You are going to use the tip of a screwdriver handle or even a spoon to compress the softened plastic against a suitable (heatproof) surface so that the hole is reduced in size to around 1/8 inch. (pics 8-10) 4) Next chuck a 1/8 inch drill into a drill or dremel tool and drill additional holes in the showerhead plate. In the picture, the blue arrow points to the desired finished product. Dont overdo it. You can always add more holes later. (pics 11,12) 5) Clean the two plates of bits of plastic flash, making sure none gets in the clear water tank. If needed, fill the clear water tank, swish it around and empty several times to make sure. The goal is to keep the plastic dust out of your coffee! (pic 13) 6) Place the modified showerhead back in place and press it down making sure that it clicks into place all around its periphery. Voila! Youre done. Enjoy the coffee. (pics 14,15)
You can contact Ted about his coffee brewer mod at: tnjsimpson1@comcast.net DISCLAIMER"These mods are shown for demonstration purposes only, and if you choose to make these mods, you are on your own. We will not take responsibility for injury or damage to person or property due to your choice to modify your coffeemaker. Any changes you make to this coffeemaker, or any other appliance is your full responsibility." Ed Needham 2004 |
 Step #1--Locate hinged lid over filter area. 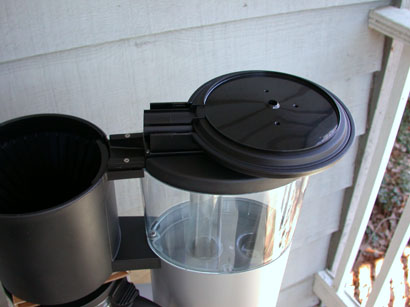 Step #2--Open hinged lid.  Step #3--Insert finger into water path tube.  Step #4--Lift the showerhead plate off of its assembly.  Step #5--Observe the U-shaped dams in the top and bottom plates that comprise the showerhead assembly. 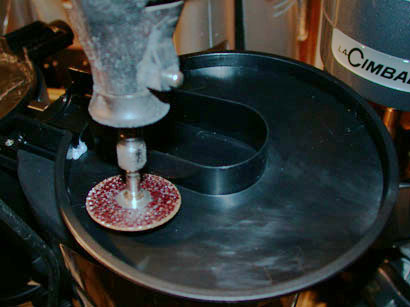 Step #6--Remove these dams, staying flush with the surface. (I used a dremel tool and a cutoff wheel) 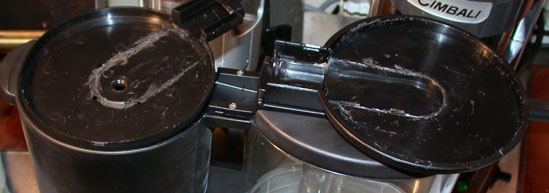 Step #7--Cutting pliers or even just bending the thin plastic back and forth until it breaks will work. Whatever method you use, do not cut through the top or bottom plates, just the dams. 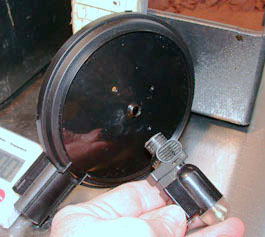 Step #8--Take a small torch or butane lighter and carefully heat the plastic around the large middle hole, heating both the inside and outside of the plate around the hole. 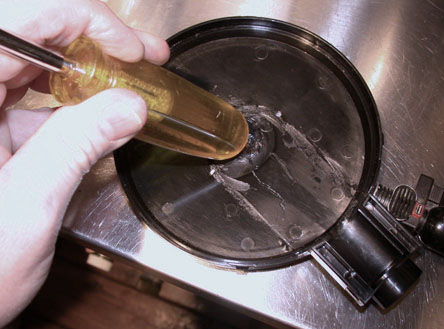 Step #9--You are going to use the tip of a screwdriver handle or even a spoon. 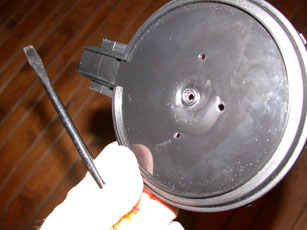 Step #10--Compress the softened plastic against a suitable (heatproof) surface so that the hole is reduced in size to around 1/8 inch. 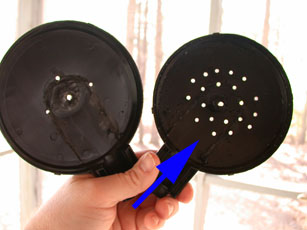 Step #11--Next chuck a 1/8 inch drill into a drill or dremel tool and drill additional holes in the showerhead plate. In the picture, the blue arrow points to the desired finished product. 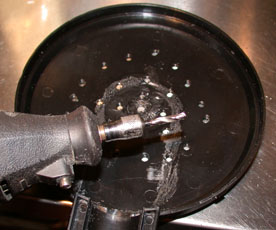 Step #12--Dont overdo it. You can always add more holes later. 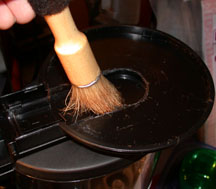 Step #13-- Clean the two plates of bits of plastic flash, making sure none gets in the clear water tank. If needed, fill the clear water tank, swish it around and empty several times to make sure. The goal is to keep the plastic dust out of your coffee! 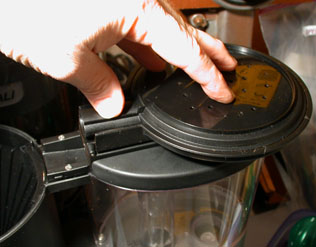 Step #14--Place the modified showerhead back in place and press it down making sure that it clicks into place all around its periphery. 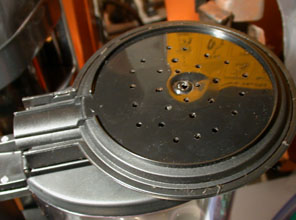 Step #15--Voila! Youre done. Enjoy the coffee. |
|
The Homeroaster is dedicated to helping the coffee homeroaster explore, find, acquire, roast and brew coffee to achieve the ultimate coffee experience. If you have suggestions for articles or information concerning homeroasting, please send them to me. Great things are coming in the near future for homeroasting, and I am excited about the possibilities! Please check back soon for great homeroasting information and opportunities for coffee homeroasters!
Ed Needham |

|
Quote of the day..." Drink Good Coffee. You can sleep when you're DEAD! "
author unknown, but passed on to me by Robert Holland on the Homeroast List--Thanks! |
 Back to the Main Menu
